Python Download and Install
How to Download and Install Python on Your Computer (Step-by-Step Guide)
Installing Python is the first step to opening up a world of programming possibilities. Whether you’re working with Python 2 for older projects or exploring the newest features of Python 3, it’s critical to select the appropriate Python version for your needs. This guide will walk you through the download and installation process to ensure you’re prepared for Python success.
Step 1: Visit the Python Official Website
To download Python, head over to the official Python website at python.org. Python.org hosts all official releases of the language for various platforms, including Windows, macOS, and Linux. It is the most secure and trusted source to download Python.

Navigating to the Downloads Page:
Go to the Homepage: Once you’re on Python.org, you’ll see a prominent “Downloads” section at the top of the page.
Direct link to the Downloads page: https://www.python.org/downloads/
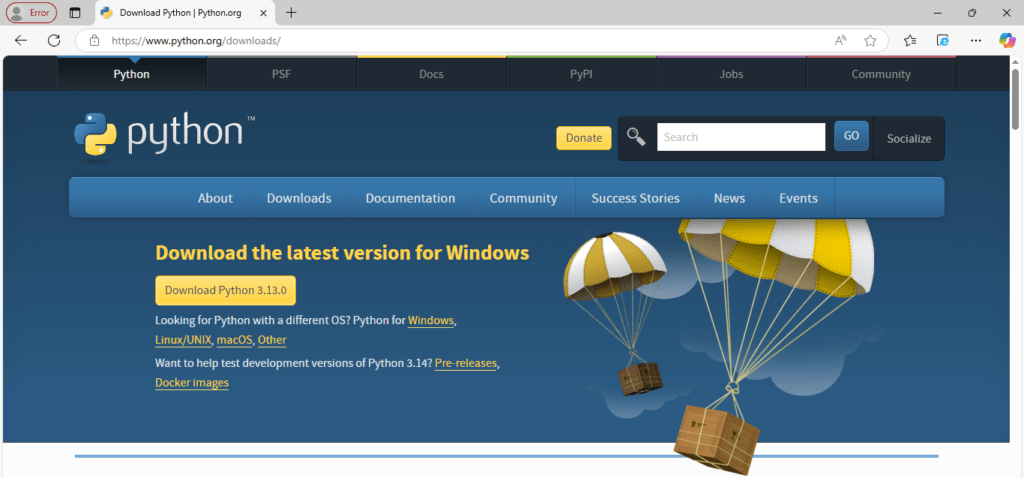
Automatic Platform Detection: The Python website automatically detects your operating system (Windows, macOS, or Linux). It will recommend the best version for your platform. If you’re using Windows, for example, you’ll see a button like “Download Python 3.x.x” (where x.x represents the latest version number)
Click the Download Button: To download the recommended version, simply click the “Download Python 3.x.x” button.
If you want to download a specific version of Python or check the release notes, scroll down and click on the version you need from the list of available downloads.
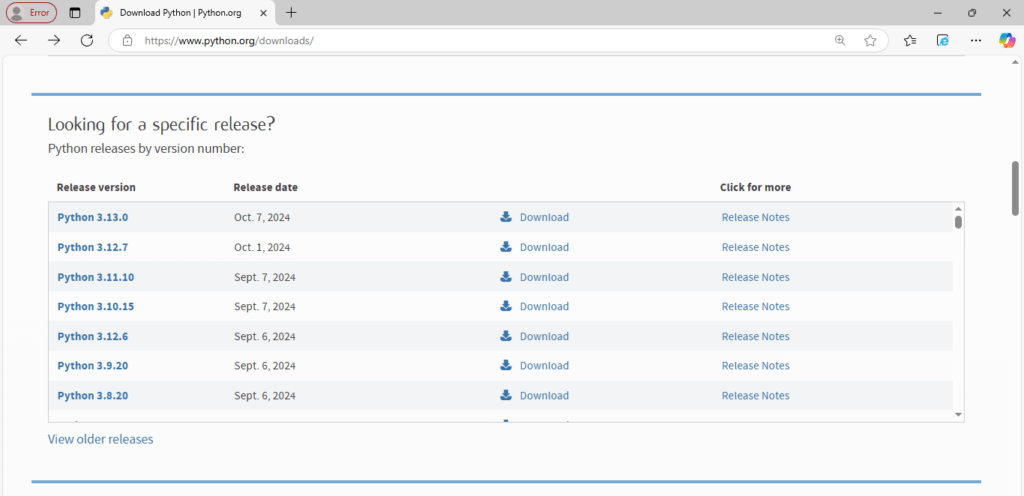
Step 2: Choose Your Python Version
Before you begin downloading Python, it’s important to understand the different versions available. Python 2.x and Python 3.x are the two major versions of the language, but Python 2 is no longer maintained as of January 1, 2020. As a result, Python 3 is the recommended version for all new projects. While some legacy systems may still be using Python 2, it’s best to use Python 3 for modern programming.
Why Choose Python 3?
- Future-Proof: Python 3 is the future of the language, with active development and support.
- Features: Python 3 includes modern features like improved Unicode support, async features for concurrent programming, and better libraries.
- Community Support: As Python 2 is no longer supported, community-driven projects, libraries, and frameworks are now focusing on Python 3.
When Might You Use Python 2?
You may encounter Python 2 in legacy systems, old projects, or specific environments that haven’t been upgraded. However, it’s recommended to avoid starting new projects in Python 2 and instead focus on upgrading existing projects to Python 3.
Step 3: Download the Python Installer
Selecting the Correct Version for Your Operating System
Windows: When you click the download button for Windows, it will automatically download an .exe file for the latest Python 3 version.
macOS: Clicking the download button for macOS will give you a .pkg file, which is the standard macOS installation format for software.
Linux: Most Linux distributions come with Python pre-installed. However, you can download the latest version manually from Python.org or use the package manager in your terminal. For example, on Ubuntu, you can use the following command to install Python:
sudo apt update
sudo apt install python3
It’s crucial to select the latest stable version of Python 3 (e.g., Python 3.13.x or 3.12.x) to benefit from the newest features, security patches, and updates.
Step 4: Run the Installer
After the installer has finished downloading, it’s time to start the installation process. The exact steps depend on your operating system.
For Windows Users:
Locate the Installer: Go to the folder where the installer was downloaded (usually the Downloads folder) and double-click the .exe file to begin the installation.
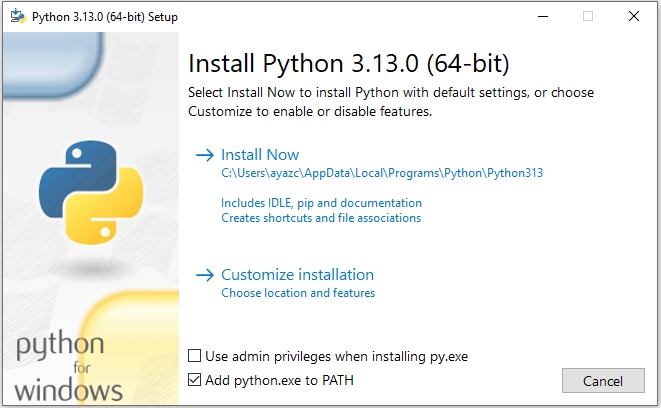
Add Python to PATH: This is a crucial step! Before clicking “Install Now,” make sure to check the box labeled “Add python.exe to PATH”. This option adds Python to your system’s environment variables, allowing you to run Python from the command line or terminal without specifying the full path.
- This step is important because without adding Python to PATH, you’ll need to specify the exact path every time you want to run Python commands.

Install Python: After selecting the option to add Python to PATH, click “Install Now”. This will install Python with the default settings, including the installation of the pip package manager, which allows you to easily install third-party Python packages.

Customize Installation (Optional): If you want to customize the installation, you can click on the “Customize Installation” option, where you can select additional features, change the installation location, or choose to install Python documentation.

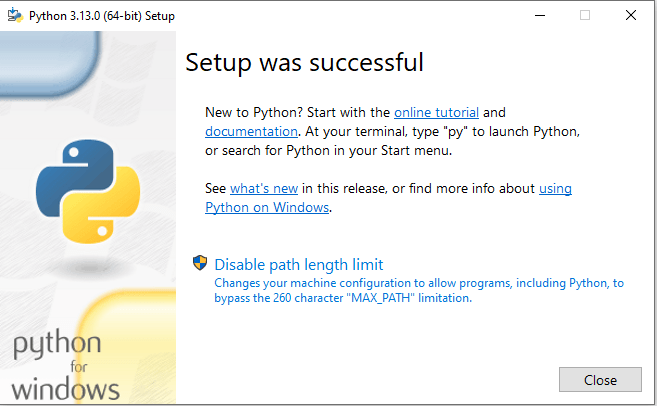
Finish Installation: After the installation process completes, a message will appear confirming that Python was successfully installed. You can now close the installer.
For macOS Users:
Run the Installer: After the .pkg file finishes downloading, double-click to open it. The installer will guide you through the installation process.
Follow the On-Screen Instructions: The process is mostly automated. The installer will ensure that Python is properly installed on your system.
Finish Installation: Once the installation is complete, the Python 3 interpreter will be ready for use. macOS will also ensure that the Python binary is added to your system’s PATH automatically.
For Linux Users:
Install via Package Manager: In most cases, Python is already installed on Linux. To install or upgrade, open a terminal and run:
sudo apt update
sudo apt install python3
Download from Python.org: If you prefer, you can manually download the source code from the Python website and compile it using the terminal. However, using the package manager is usually faster and more efficient.
Step 5: Verify Python Installation
Once Python is installed, it’s important to confirm that everything is set up correctly.
For Windows and macOS Users:
Open Command Prompt (Windows) or Terminal (macOS).
Click on the Start button (Windows logo) in the lower-left corner of your screen. Type “cmd” or “Command Prompt” in the search bar. Click on Command Prompt in the search results to open it. Using the Run Dialog: Press Win + R on your keyboard to open the Run dialog box. Type “cmd” in the box and press Enter.
Click on Terminal in the search results to open it. Through Finder: Open Finder from the dock. Navigate to Applications > Utilities. Double-click Terminal to open it.
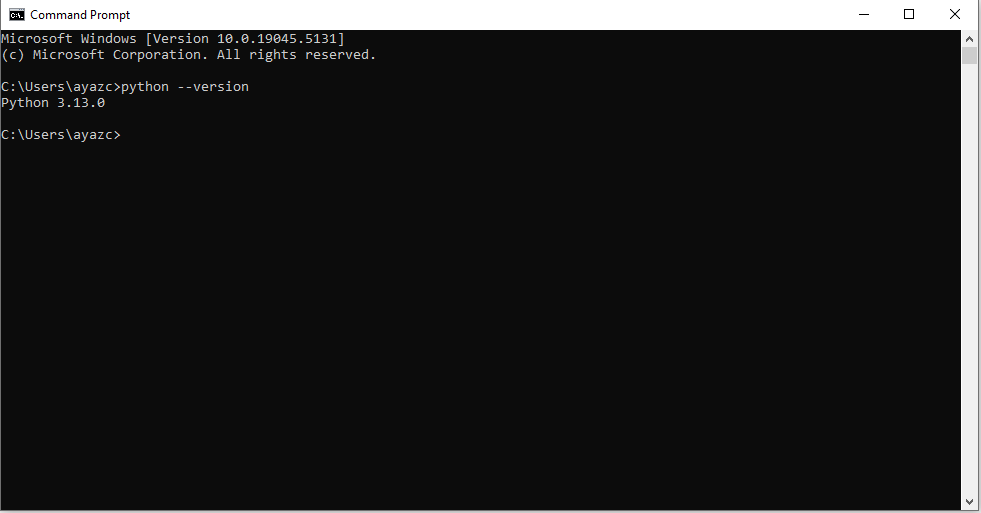
Type the following command to check the Python version:
python --version
If you have multiple versions of Python installed, you may need to type:
python3 --version
This command should display the version of Python that was installed (e.g., Python 3.10.x), confirming that Python is installed correctly.
For Linux Users:
Open the terminal and type:
python3 --version
This should also return the Python version number, confirming that Python is ready to use.
Step 6: Install Pip (Python Package Manager)
Python comes with pip, the package manager that allows you to install third-party libraries and tools. Most Python installations come with pip pre-installed, but if it’s not available, you can install it manually.
Check if Pip is Installed:
In your terminal or command prompt, type:
pip --version
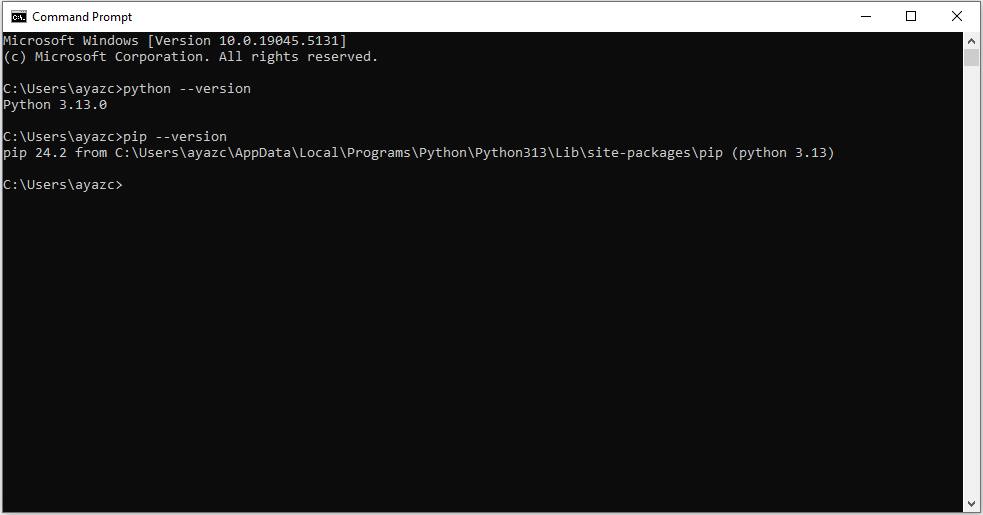
If pip is installed, this command will return the pip version number. If pip isn’t installed, run the following command to install it:
python -m ensurepip --upgrade
Step 7: Set Up an IDE or Code Editor
Now that Python is installed and working, it’s time to set up your development environment. An Integrated Development Environment (IDE) or a code editor is essential for writing and executing Python code efficiently.
Some popular IDEs and code editors include:
Visual Studio Code (VS Code): A lightweight and highly extensible editor with Python support.
PyCharm: A powerful IDE specifically built for Python development.
Jupyter Notebook: Ideal for data science and machine learning projects.
Sublime Text: A fast and customizable code editor.
Download and install the editor of your choice, and you’re ready to start coding in Python.
Conclusion
Congratulations! You’ve successfully installed Python on your system and are now ready to start coding. Python is a fantastic language to learn and offers many opportunities, from building web applications to diving into machine learning, data science, automation, and beyond.
To further enhance your learning, explore Python’s vast libraries, frameworks, and tutorials, and don’t forget to practice coding regularly. Happy coding!